Sophos ZTNA (P1): Cấu hình Azure AD trên Sophos Central (Cloud) dùng để xác thực cho ZTNA
15/09/2023 14:00 262 lần Chuyên mục: Bài viết kỹ thuật
1. Các bước cần cấu hình:
Tạo Active Directory
Tạo AD app
+ Tạo Redirect URL
+ Cấu hình API permission
+ Tạo Client secret
+ Tạo Group cho các thành viên
Cấu hình Central Azure AD Synchronization
Cấu hình ZTNA Identity Providers trên Sophos Central
2. Hướng dẫn cấu hình:
2.1 Tạo AD
Bước 1:
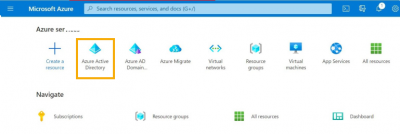
- Đăng nhập Azure portal
- Chọn Azure Active Directory
Bước 2:
- Trong Overview, chọn Manage Tenant > Create

Bước 3:
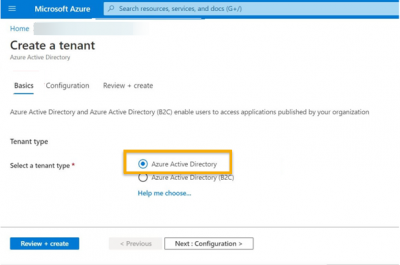
- Mục Basics, chọn Azure Active Directory.
- Mục Configuration, điền thông tin > Next: Review + Create.

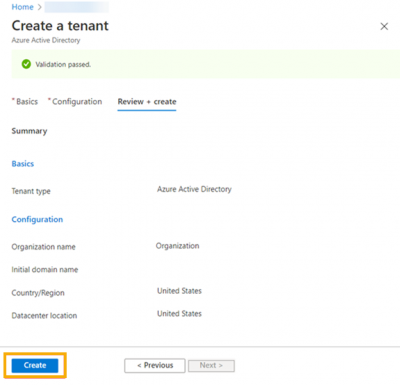
- Kiểm tra thông tin > Create.
2.2 Tạo ZTNA App
Bước 1:
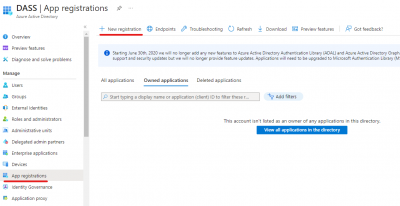
- Chọn vào AD vừa mới tạo ở mục 2.1
- Chọn App registrations > New registration.
Bước 2:
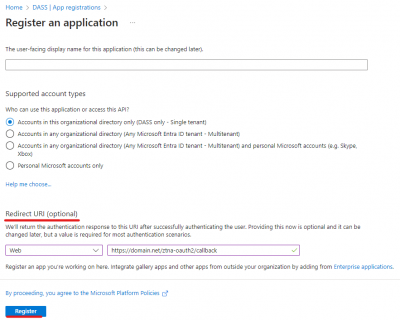
- Nhập tên của app.
- Mục Supported account types, chọn mặc định.
- Mục Redirect URL, chọn Web > điền domain (https://“domain.net”/ztna-oauth2/callback). Tên “domain.net” thay đổi thành domain bạn muốn dùng và phân giải được trên internet.
- Nhấn Register.
Bước 3:
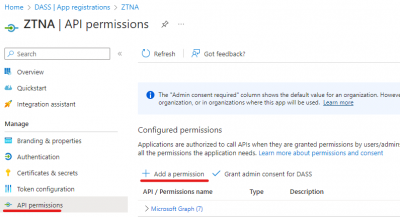
- Chọn vào App vừa mới tạo xong ở bước 2.
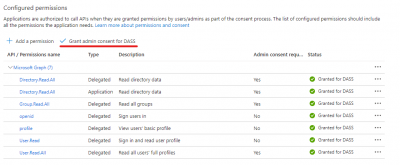
- API permissions > Add a permissions
Bước 4:
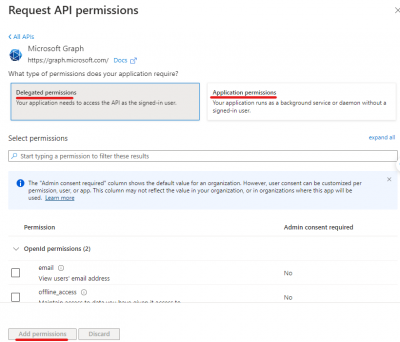
- Chọn Microsoft Graph

– Mục Delegated permissions, chọn:
-
- Directory.Read.All
- Group.Read.All
- openID
- profile (profile is in the openID set of permissions)
- User.Read
- User.Read.All
– Mục Application permission, chọn:
-
- Directory.Read.All
– Nhấn Add Permission
Bước 5:
- Kiểm tra lại các permission đã chọn > Nhấn Grant Admin Consent
Bước 6:
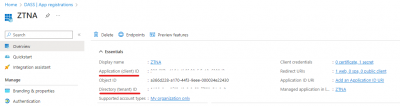
- Ở App, chọn Overview, lưu các thông tin client ID và tenant ID
Bước 7:
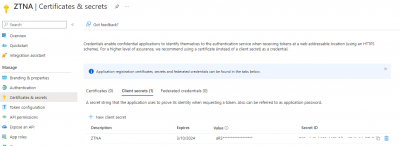
- Chọn Certificates & secrets > New client secret. Lưu lại thông tin Secret ID.
Bước 8:
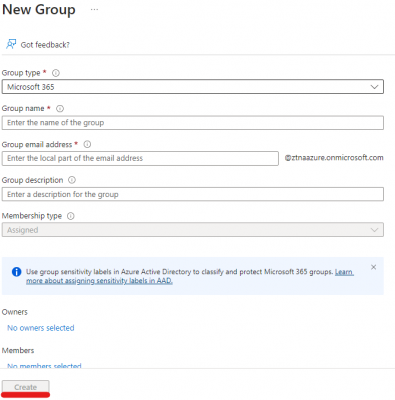
- Quay lại Azure Active Directory, chọn Groups > New group
- Điền các thông tin và nhấn Create.
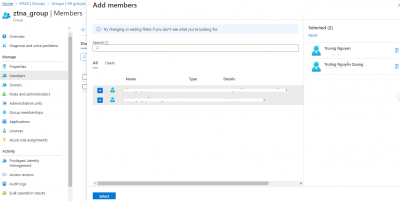
Bước 9:
- Chọn vào group vừa mới tạo > chọn Members > Add members.
- Tích chọn member muốn thêm > chọn Select.
2.3 Cấu hình Central Azure AD Synchronization
Bước 1:
- Đăng nhập vào Sophos Central
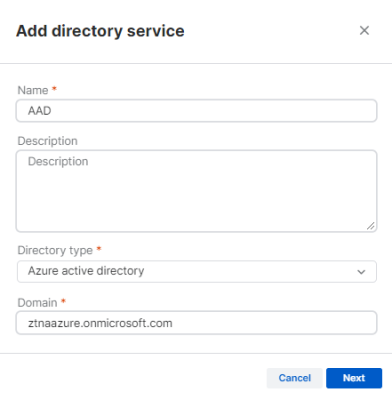
- Chọn Global Settings > mục Administration > chọn Directory service > Add directory service.
– Điền thông tin:
+ Nhập tên
+ Directory type: chọn Azure
+ Domain: nhập domain AD mà ta đã tạo ở mục 2.1
Bước 2:
- Điền các thông tin Client ID, Client secret, domain mà ta đã lưu trước đó.
- Nhấn Test connection, kiểm tra kết nối tới Azure.
- Chọn All users and groups to đồng bộ hóa.
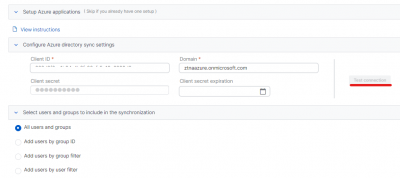
- Nhấn Save > Turn On > Synchronize.

2.3 Cấu hình ZTNA Identity Providers trên Sophos Central
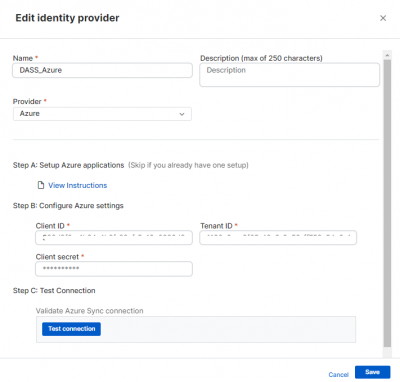
*Lưu ý: Chỉ có thể tạo được 1 Azure identity provider.
Vào ZTNA > Identity Providers > Add identity providers
Điền thông tin vào. Nhấn Test connection để kiểm tra kết nối.
Nhấn Save.
Tham khảo thêm: Sophos ZTNA (P2): Hướng dẫn cấu hình Sophos Cloud gateway với Sophos Firwall.
Fan page: Công ty Cổ Phần DASS